


DIY land clearing:
If you are looking to create more lawn space or perhaps make room in your yard for a house extension, new shed, new driveway, or even a pool, then land clearing makes for a rewarding DIY project. While tall, large or thick trees might require council approval and professional expertise to remove, many private backyard clearing projects can be done yourself.
Clearing out your backyard makes for a great first DIY project for anyone. Projects like this also make for a great introduction to labour work for teenagers, and could even prove to be a good family bonding experience.
With all this in mind, we’ve compiled a basic step-by-step guide, along with a few tips and tricks to help you visualise, plan, and tackle a DIY yard clearing job.
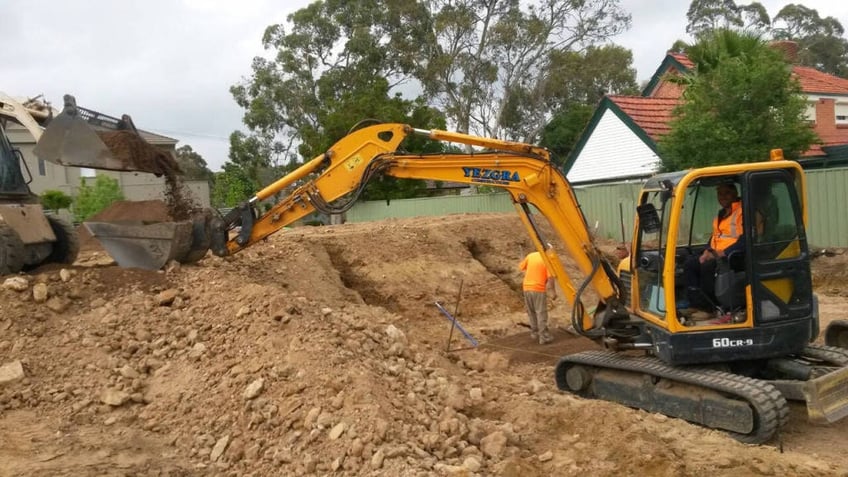 Image via Rose's Earthmoving YP
How to clear out your backyard:
Step 1 - Know the lay of the land
Contact Dial Before You Dig to acquire information on utilities cables and pipes that might be running underneath your yard. This information will dictate the sort of work you’ll be able to do, where you might need to avoid excavation in certain parts of your yard or look into hiring a non-destructive digging specialist to perform hydro excavation around the utilities.
Step 2 - Create a plan
Undertake project area measurements and identify the parts of your yard you want to clear, noting the number of trees. Also take note of access to your yard, as some machines may be too wide to access some backyards. Contact your local council to see if a permit is required to remove particular trees, additionally check to see if a restrictive Vegetation Protection Order has been placed on your property.
Step 3 - Organise machines and any missing equipment
Undertake a search on iseekplant to find a mini excavator or excavator, a mulcher or wood chipper plant or add-on, a stump grinder, and a removal truck. Note that the scope and scale of your land clearing project will determine what machinery you need. If the project area is small, you may only need an axe, shovel and a mini excavator .
Step 4 - Knock down trees
Depending on the number and type of trees you have - there a few options when it comes to getting trees down. First off, you could use a hired excavator with either a muncher add-on or saw add-on, depending on the sort of trees you're dealing with. Alternatively, start off by knocking or cutting off the branches of the trees with a lopper, then use an axe or chainsaw to knock the trees down to a stump. Note that you will need to hire a trained tree removalist/lopper if a tree is taller than 5m or where it may present risk to yourself or your neighbours.
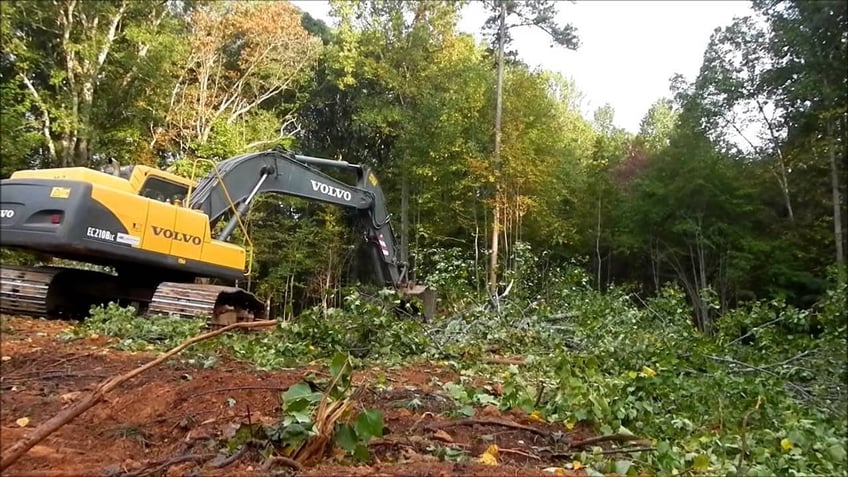
-1.jpg?width=848&name=WestVic%20Earthmoving%20(1)-1.jpg) Image via WestVic Earthmoving
Image via WestVic Earthmoving
Step 5 - Remove tree stump
Once you've knocked the trees down to their stumps, depending on the size of the stumps and roots, you can either use a stump grinder or remove them manually.
To remove tree stumps and roots without a stump grinder, dig around the stump (dig further out from the stump to avoid close roots), once you expose the upper root system begin to remove it by hand with the help of an axe, pruning saw or cutters, from here cut the lower roots and pull the stump out, proceed to then fill the hole with soil.
Step 6 - Conduct a full clean out of the area
Collect all stumps, fallen branches, leaves, as well as any easy-to-remove plants and bushes. Move this collection away from the project area.
Step 7 - Excavate topsoil
Use an excavator to clear out remaining foliage and topsoil. Excavate topsoil with a digger , mini excavator or excavator, where the dig depth will depend on what your future plans are. Future plans might include laying down fresh lawn, building a vegetable garden, a shed, a driveway, a pool, or a patio. If you are laying lawn, be sure to strip around 150mm deep (six inches) of soil, and then fill with loam soil, or a mixture of 80% sand and 20% loam.
Step 8 - Fill in the site, level, and compact soil
Once excavated, fill the site with the desired soil, loam, or clean fill, level and compact the soil with a compactor. Once you’ve excavated the site to the right depth, you can fill it with loam soil for a new lawn or simply transition to one of our other DIY projects, like building a driveway (concrete slab) and building a shed.
Step 9 - Dispose of garden waste and excess soil
For soil, you can take it to the tip or find a company that collects clean fill. You have three options when it comes to garden waste disposal. The first is to use a ute, trailer, or removal truck to transport and dump your garden waste at a tip. The second option, if there isn’t much garden waste (leaves, plants, wood), is to simply place it into your green bin. The third option is to process your garden waste through a mulcher, which will give you mulch to use later on.
What machines are used to clear land?
- Mulchers
- Stump grinders
- Mini excavators, excavators, or dingos
- Removal trucks
What materials and equipment will I need to clear my yard?
- Axe or chainsaw
- Gloves
- Sunscreen
- Wheelbarrow
- Measuring tape
- Shovel
- Tree lopper
- Machine attachments
- Mulcher or wood chipper
- Stump grinder
- Mini excavator, excavator, or dingo
- Removal truck
Do I need permission to cut down a tree?
Every Australian council handles tree removal differently, so always check with your local council first before starting work. For example, if you live in Brisbane, you’d call Brisbane City Council who would then check to see if a Vegetation Protection Order (VPO) has been placed on your property. If a VPO has been issued on your property then you will need to first acquire a permit from the council before you are allowed to remove any trees on your land.
How much does tree removal cost?
Tree removal by a contractor could cost anywhere from $300 up for a 5m tree. The cost of tree removal depends on the number of trees along with tree thickness and height. For trees that are taller than 6 metres, we recommend hiring a professional.
DIY backyard clearing vs. land clearing contractor
DIY Pros:
- Great way to pass time on the weekend
- Good learning experience for kids
- Boasting rights at your next family BBQ
- A chance to hone in your clearing, excavating and gardening skills
DIY Cons:
- It’s not relaxing work and may take a full weekend
- Budgeting may go awry without adequate research for materials and machinery (comparing prices amongst suppliers)
Contractor Pros:
- They offer a higher standard of quality as they complete projects like this regularly
- You know what to expect - the design and time frame of construction
- They can complete the job during the week - while you are at work
- They can typically complete the task far quicker
Contractor Cons:
- You can’t claim it as a personal project
- Typically spend more due to the cost of expertise and labour
In light of this, our directory is chock-a-block full of suppliers, machines, and equipment to help you with your newest residential or commercial challenge. From land clearing and excavation to concrete pouring, iseekplant has you covered with all the services, machinery, and equipment you need for your next DIY project!
Click here to find and compare suppliers that can help with your DIY project!